RIFF JTAG – CDMA Haier C6000 Repair supported

22.04.2011   CDMA Haier C6000 Repair supported

Resurrecting Haier C6000 is simple. Phone is auto powered on with USB Cable connected to the PC. Battery presence is not required; connection can be established with detached board.
Current resurrector contains Firmware and EEPROM zones for memory chip with ID 0x017E/0x2210

To resurrect Haier C6000:

  • Solder JTAG cable to Haier C6000 JTAG pads;
  • Insert USB Data cable into board and PC;
  • Make sure Haier C6000 is selected in the list of models;
  • Click Resurrect button;
  • Choose which areas to flash;
  • Wait till software signals a successful operation completion;
  • De-solder JTAG wires;

Please click “Check For Updates” button in order to download and apply new files. Closing all running application before starting update process is recommended.

RIFF JTAG – CDMA Haier C5100 Repair supported

22.04.2011  CDMA Haier C5100 Repair supported

Resurrecting Haier C5100 is simple. Phone is auto powered on with USB Cable connected to the PC. Battery presence is not required; connection can be established with detached board.
Current resurrector contains Firmware and EEPROM zones for memory chip with ID 0x00EC/0x257E

To resurrect Haier C5100:

  • Solder JTAG cable to Haier C5100 JTAG pads;
  • Insert USB Data cable into board and PC;
  • Make sure Haier C5100 is selected in the list of models;
  • Click Resurrect button;
  • Choose which areas to flash;
  • Wait till software signals a successful operation completion;
  • De-solder JTAG wires;

Please click “Check For Updates” button in order to download and apply new files. Closing all running application before starting update process is recommended.

RIFF JTAG – CDMA Haier C2040 Repair supported

22.04.2011  CDMA Haier C2040 Repair supported

Resurrecting Haier C2040 is simple. Phone is auto powered on with USB Cable connected to the PC. Battery presence is not required; connection can be established with detached board.
Current resurrector contains Firmware and EEPROM zones for memory chip with ID 0x00EC/0x257E

To resurrect Haier C2040:

  • Solder JTAG cable to Haier C2040 JTAG pads;
  • Insert USB Data cable into board and PC;
  • Make sure Haier C2040 is selected in the list of models;
  • Click Resurrect button;
  • Choose which areas to flash;
  • Wait till software signals a successful operation completion;
  • De-solder JTAG wires;

Please click “Check For Updates” button in order to download and apply new files. Closing all running application before starting update process is recommended.

RIFF JTAG – CDMA Haier C3010, LG LSP450T Repair supported

22.04.2011  CDMA Haier C3010, LG LSP450T Repair supported

Resurrecting Haier C3010 is simple. Phone is auto powered on with USB Cable connected to the PC. Battery presence is not required; connection can be established with detached board.
Current resurrector contains Firmware and EEPROM zones for memory chips with IDs 0x00EC/0x257E and 0x017E/0x2210. Proper data will be selected automatically depending on memory ID in your device.

To resurrect Haier C3010:

  • Solder JTAG cable to Haier C3010 JTAG pads;
  • Insert USB Data cable into board and PC;
  • Make sure Haier C3010 is selected in the list of models;
  • Click Resurrect button;
  • Choose which areas to flash;
  • Wait till software signals a successful operation completion;
  • De-solder JTAG wires;

Resurrecting LG LSP450T is simple. Phone is auto powered on with USB Cable connected to the PC. Battery presence is not required; connection can be established with detached board.
Current resurrector contains Firmware and EEPROM zones for memory chip with ID 0x0020/0x8867

To resurrect LG LSP450T:

  • Solder JTAG cable to LG LSP450T JTAG pads;
  • Insert USB Data cable into board and PC;
  • Make sure LG LSP450T is selected in the list of models;
  • Click Resurrect button;
  • Choose which areas to flash;
  • Wait till software signals a successful operation completion;
  • De-solder JTAG wires;

Please click “Check For Updates” button in order to download and apply new files. Closing all running application before starting update process is recommended.

RIFF JTAG – HTC Advantage X7510 (HTC Athena) Unbrick – Boot Repair supported

04.04.2011  HTC Advantage X7510 (HTC Athena) Unbrick – Boot Repair supported

Resurrection of HTC Athena is easy. Most convenient is to have USB cable connected and battery inserted.
If during connection progress bar in JTAG Manager keeps running from 0 to 100% press with stylus the reset button on the phone (reset button is near to the JTAG pads).
Resurrector will reflash IPL and SPL areas. You can select SPL version to be flashed in the settings window which popups before resurrection. IPL which is flashed: “ATHENA IPL DVT 2.02 H3” version.
Current resurrector works only with HTC Athena hardware revisions which have DiskOnChip H3 memory chip installed. If you have hardware revision with DiskOnChip G4 memory chip used then select different resurrector.

To resurrect HTC Athena with DiskOnChip H3:

  • Solder JTAG cable to HTC Athena JTAG pads;
  • Insert battery and connect USB cable to phone and PC;
  • Make sure HTC Athena is selected in the list of models;
  • Click Resurrect button;
  • Wait till software signals a successful operation completion;
  • Disconnect USB cable, de-solder JTAG wires;

Now phone is in bootable condition, that is, even if it does not start up normally you can flash it using known flashing methods.

To enter download mode:

  • Disconnect PC cable;
  • Insert battery;
  • Hold ‘Camera’ key and press ‘Power ON’ key or use stylus to press ‘Reset’ button. In few seconds you should see TriColor picture.

Additional info:

  • DiskOnChip H3’s full NAND memory chip is divided into partitions by the internal memory controller. Thus DCC Loader creates virtual FLASH chip for each partition – you can read/write these partitions by selecting proper ROM index (“Access ROMi Address Space”) on the JTAG Manager’s DCC Read/Write page;
  • DiskOnChip H3 has no spare zones, thus only Main field must be used during write operations. ECC Enable checkbox has no meaning here.

Please click “Check For Updates” button in order to download and apply new files. Closing all running application before starting update process is recommended.

RIFF JTAG – Toshiba Portege G900 Unbrick, Dead Boot repair supported

14.03.2011 Toshiba Portege G900 Unbrick, Dead Boot repair supported

Resurrection of Toshiba Portégé G900 PDA part is not hard. Battery is required for successful HALT operation. If USB Data Cable is connected phone is auto powered on when battery is inserted.
If during connect operation (“Establish communication with the phone…”) after 2-3 passes there is still no success (progress bar keeps running from 0 to 100% and so on) then remove battery and insert it again. If USB cable is not connected then press and hold Power On key.
Current resurrector re-flashes only the EBOOT and secondary EBOOT area, and will not re-write IPL area (though write of this area is supported too).
Please note: DiskOnChip G4 memory has security features, due to which there is a risk of permanently blocking the access to the flash memory while re-flashing the IPL areas. Current resurrector will not touch the IPL zone, but it is possible you’re already holding such killed device in hands. If it is so you will see this error:
****************************************************************
Detected a Not Initialized FLASH1 Chip ID: 0x0400/0xFBFF
ERROR: Selected FLASH Chip was not initialized by the DCC Loader
****************************************************************

This can happen due to unknown protection keys used or due to permanently blocked MDOC chip. If latter is true we advise you to solder a new flash memory chip or throw this phone away to the trash bin.

To resurrect Toshiba G900 PDA part:

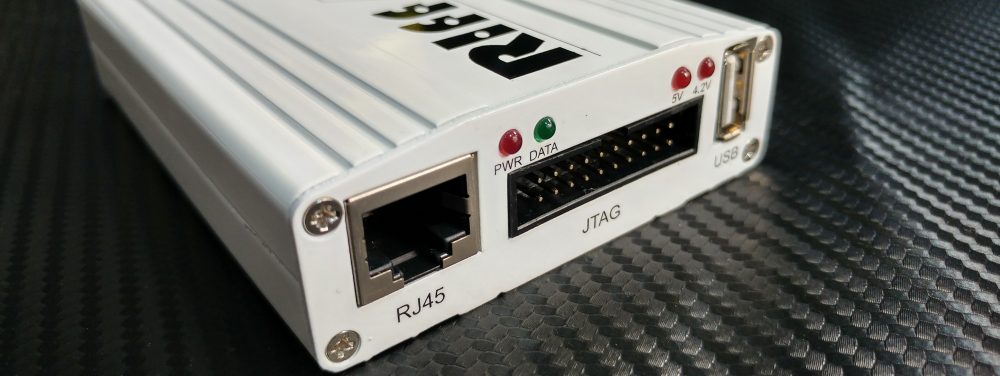
  • Solder JTAG wires to the Toshiba G900 PDA pads;
  • Connect USB cable to phone and PC;
  • Make sure Toshiba G900 PDA is selected in the list of models;
  • Insert battery and click Resurrect button;
  • Wait till software signals a successful operation completion;
  • Disconnect USB cable, de-solder JTAG wires;

Now phone is in bootable condition, that is, even if it does not start up normally, you can flash it using known flashing methods.

To enter USB download mode:

  • Disconnect PC cable;
  • Insert battery;
  • Hold ‘Left soft’ key (which is exactly above the Dial key) and press ‘Power ON’ button. In few seconds you should see red download screen.

To enter SD-card download mode:

  • Disconnect PC cable;
  • Insert battery;
  • Hold ‘D’ key and press ‘Power ON’ button.

Additional info:

  • Phone has DiskOnChip G4 memory type, which has security features. It has two password protected partitions (Password1 = 12345678, Password2 = 00000000);
  • IPL re-flash is not performed in this resurrector on purpose. While re-flashing the IPL area there is a risk of permanently blocking the memory chip.
  • Any write access (Erase or Write) on MDOC NAND memory range 0x00000000 to 0x0017FFFF is rejected by the DCC Loader. For full image writing convenience access to that range will not rise any error, data will just be ignored and reported as if it was written successfully, thus you still can write full image files using ‘Auto FullFlash Size’ checked.

Please click “Check For Updates” button in order to download and apply new files. Closing all running application before starting update process is recommended.

RIFF JTAG – ASUS P526 Unbrick, Dead Boot repair supported

10.03.2011   ASUS P526 Unbrick, Dead Boot repair supported

Resurrection of ASUS P526 is slightly complicated. JTAG pads are very small and sensitive thus extreme care must be taken when soldering wires to the board. Battery must be connected in order to establish JTAG connection.
Current resurrector re-flashes only the IPL area, and will not re-write MDOC XLOADER area (though write of this area is supported too).
Please note: DiskOnChip G4 memory has security features, due to which there is a risk of permanently blocking the access to the flash memory while re-flashing the XLOADER areas. Current resurrector will not touch the XLOADER zone, but it is possible you’re already holding such killed device in hands. If it is so you will see this error:
****************************************************************
Detected a Not Initialized FLASH1 Chip ID: 0x0400/0xFBFF
ERROR: Selected FLASH Chip was not initialized by the DCC Loader
****************************************************************

This can happen due to unknown protection keys used or due to permanently blocked MDOC chip. If latter is true we advise you to solder a new flash memory chip or throw this phone away to the trash bin.

To resurrect ASUS P526:

  • Solder JTAG cable to ASUS P526 JTAG pads;
  • Insert battery and connect USB cable to phone and PC;
  • Make sure ASUS P526 is selected in the list of models;
  • Click Resurrect button;
  • Wait till software signals a successful operation completion;
  • Disconnect USB cable, de-solder JTAG wires;

Now phone is in bootable condition, that is, even if it does not start up normally, you can flash it using known flashing methods.
If phone not enters download mode after resurrection then it means XLOADER was damaged too but memory chip is still usable. In this case repeat resurrection using RAM Downloader Mode and when USB connection is established reflash the phone with official firmware.

To enter download mode:

  • Disconnect PC cable;
  • Insert battery;
  • Move ‘Lock’ slider down, hold ‘OK’ key (on the left) and press ‘Power ON’ button. In few seconds you should see TriColor picture.

Additional info:

  • Phone has DiskOnChip G4 memory type, which has security features. It has two password protected partitions (Password1 = 12345678, Password2 = 00000000);
  • XLOADER re-flash is not performed in this resurrector on purpose. While re-flashing the XLOADER area there is a risk of permanently blocking the memory chip.
  • Any write access (Erase or Write) on MDOC NAND memory range 0x00000000 to 0x0017FFFF is rejected by the DCC Loader

Please click “Check For Updates” button in order to download and apply new files. Closing all running application before starting update process is recommended.

RIFF JTAG – RIFF JTAG Manager v1.27, RIFF Box Firmware v1.19

10.03.2011   RIFF JTAG Manager v1.27, RIFF Box Firmware v1.19

Whats new :

RIFF JTAG Manager v1.27

  • Fixed access violation bug upon JTAG Manager startup if there is no RIFF Box detected and Cancel button is clicked.
  • (SDK): more functions are now available (exported) for future Resurrector DLLs;
  • Added flags for JTAG Manager to be able to retrieve memory chip size from the DCC Loader.
  • Fixed initialization bug for NOR-related DCC Loadererss
  • ScriptEngine: added options pocessing ‘/byte’, ‘/word’, ‘/long’ to data.save.binary instruction: thus it’s possible now to read memory through script  using desired bus access width (8-,16-, or 32-bit widths).  For example: “data.save.binary c:\myfile.bin 0x00..0x11FF /word” – will read 0x1200 bytes from memory into myfile.bin file starting from address 0x00 using 16-bit bus accesses.

Note: “Read Memory” button on the JTAG Read/Write page reads memory using 32-bit bus accesses only.

RIFF Box Firmware v1.19

  • Added more H/W script (*.has) instructions;
  • Added HTC security processing functions;

Please click “Check For Updates” button in order to download and apply new files. Closing all running application before starting update process is recommended.