RIFF JTAG – HTC Droid Incredible 2 ADR6350 Boot repair, Unlock, CID, ModelID, IMEI Update

HTC Droid Incredible 2 ADR6350 Boot repair, Unlock, CID, ModelID, IMEI Update

Resurrecting HTC Incredible 2 (Droid Incredible 2 ADR6350VW) is easy. Phone is auto powered on with USB Data Cable connected to the PC while battery is connected.
Some (or all) revisions of HTC Incredible 2 boards have JTAG interface disabled (that is enable MARM JTAG Fuse is blown in the MSM8655 chip). In this case the JTAG may be enabled only by firmware itself. This is done by the FSBL loader, so writing to FSBL area is artificially disabled in the DCC Loader code. DCC Loader will discard all flashing attempts into FSBL zone and will respond with success code as if flashing succeeded. In this way FSBL zone is protected while user still can flash full image files seamlessly.
Resurrector will reflash radio’s boot zone (except FSBL area) and will re-write PDA’s SPL version 6.13.1002. Additionally to SPL and Radio zones, the zone which contains Model ID is re-flashed too. Thus after resurrection phone will have Model ID = ‘PG3210***’.
There is option to reflash BOOT and RECOVERY zones.
Please note, if your phone has the FSBL loader damaged and MCU has JTAG FUSE blown then there is no way to resurrect your phone via JTAG interface.
To resurrect HTC Incredible 2:

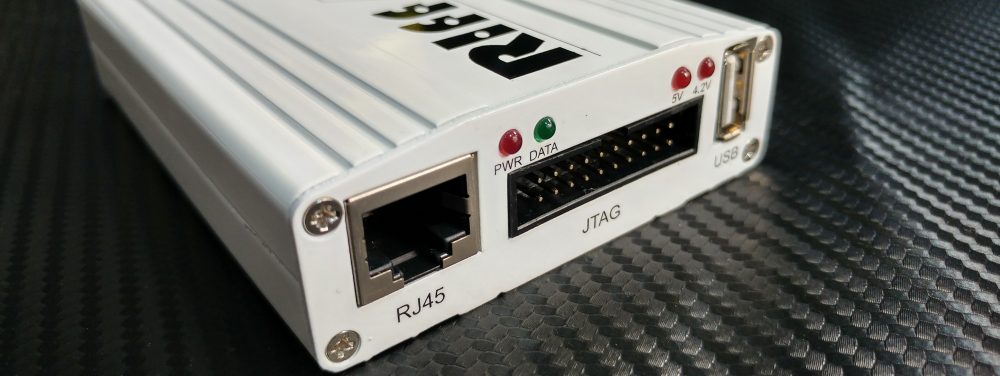
  •  Solder JTAG cable to HTC Incredible 2 JTAG pads;
  •  Insert batter and connect USB Data cable;
  •  Make sure HTC Incredible 2 is selected in the list of models;
  •  If you use only battery, press Power On key;
  •  Click Resurrect button;
  •  Wait till software signals a successful operation completion;
  •  Disconnect power supply, de-solder JTAG wires;

Now phone is in bootable condition, that is, even if it does not start up normally you can flash it using known flashing methods.
To enter download mode:

  •  Disconnect PC cable;
  •  Insert battery;
  •  Hold ‘Volume Down’ key and press ‘Power ON’ button.

_

RIFF JTAG – HTC Inspire 4G A9192 (HTC Stallion) Unbrick, Boot, IMEI, CID, ModelID, Unlock supported

HTC Inspire 4G A9192 (HTC Stallion) Unbrick, Boot, IMEI, CID, ModelID, Unlock supported

Resurrecting HTC Inspire is easy. Phone is auto powered on with USB Data Cable connected to the PC while battery is connected.
Some (or all) revisions of HTC Inspire boards have JTAG interface disabled (that is enable MARM JTAG Fuse is blown in the MSM chip). In this case the JTAG may be enabled only by firmware itself. This is done by the FSBL loader, so writing to FSBL area is artificially disabled in the DCC Loader code. DCC Loader will discard all flashing attempts into FSBL zone and will respond with success code as if flashing succeeded. In this way FSBL zone is protected while user still can flash full image files seamlessly.
Resurrector will reflash radio’s boot zone (except FSBL area) and will re-write PDA’s SPL version 0.85.0024. Additionally to SPL and Radio zones, the zone which contains Model ID is re-flashed too. Thus after resurrection phone will have Model ID = ‘PD9812000’.
There is option to reflash BOOT and RECOVERY zones.
Please note, if your phone has the FSBL loader damaged and MCU has JTAG FUSE blown then there is no way to resurrect your phone via JTAG interface.

To resurrect HTC Inspire:

  •  Solder JTAG cable to HTC Inspire JTAG pads;
  •  Insert batter and connect USB Data cable;
  •  Make sure HTC Inspire is selected in the list of models;
  •  If you use only battery, press Power On key;
  •  Click Resurrect button;
  •  Wait till software signals a successful operation completion;
  •  Disconnect power supply, de-solder JTAG wires;

Now phone is in bootable condition, that is, even if it does not start up normally you can flash it using known flashing methods.

To enter download mode:

  •  Disconnect PC cable;
  •  Insert battery;
  •  Hold ‘Volume Down’ key and press ‘Power ON’ button.

_

RIFF JTAG – HTC Incredible S Unbrick, Unlock, CID, IMEI repair supported

30.12.2011    HTC Incredible S Unbrick, Unlock, CID, IMEI repair supported


Resurrecting HTC Incredible S is easy. Phone is auto powered on with USB Data Cable connected to the PC while battery is connected.
Some (or all) revisions of HTC Incredible S boards have JTAG interface disabled (that is enable MARM JTAG Fuse is blown in the MSM7230 chip). In this case the JTAG may be enabled only by firmware itself. This is done by the FSBL loader, so writing to FSBL area is artificially disabled in the DCC Loader code. DCC Loader will discard all flashing attempts into FSBL zone and will respond with success code as if flashing succeeded. In this way FSBL zone is protected while user still can flash full image files seamlessly.
Resurrector will reflash radio’s boot zone (except FSBL area) and will re-write PDA’s SPL version 1.13.0000. Additionally to SPL and Radio zones, the zone which contains Model ID is re-flashed too. Thus after resurrection phone will have Model ID = ‘PG3213000’.
There is option to reflash BOOT and RECOVERY zones.
Please note, if your phone has the FSBL loader damaged and MCU has JTAG FUSE blown then there is no way to resurrect your phone via JTAG interface.

To resurrect HTC Incredible S:

  •  Solder JTAG cable to HTC Incredible S JTAG pads;
  •  Insert batter and connect USB Data cable;
  •  Make sure HTC Incredible S is selected in the list of models;
  •  If you use only battery, press Power On key;
  •  Click Resurrect button;
  •  Wait till software signals a successful operation completion;
  •  Disconnect power supply, de-solder JTAG wires;

Now phone is in bootable condition, that is, even if it does not start up normally you can flash it using known flashing methods.

To enter download mode:

  •  Disconnect PC cable;
  •  Insert battery;
  •  Hold ‘Volume Down’ key and press ‘Power ON’ button.

_

RIFF JTAG – Samsung Galaxy Note (GT-i9220) Unbrick – Boot Repair Supported

29.12.2011      Samsung Galaxy Note (GT-i9220) Unbrick – Boot Repair Supported

Samsung I9220 AP (PDA Part) is based on the S5PV310 (Exynos 4210) Processor (Cortex-A9 Dual-Core). JTAG pads are very small; professional experience in soldering is required to connect wires to the JTAG interface.
Note, one simple way to connect over JTAG – connect USB cable to PC and insert battery. In this case phone is automatically powered on.

To resurrect Samsung I9220 AP:

  •  Solder JTAG cable to Samsung I9220 AP JTAG pads;
  •  Connect USB cable to phone and PC;
  •  Insert battery;
  •  Make sure Samsung I9220 AP is selected in the list of models;
  •  Make sure a fixed TCK frequency is selected;
  •  Click Resurrect button;
  •  Wait till software signals a successful operation completion;
  •  Disconnect USB cable, de-solder JTAG wires;

Now phone is in bootable condition, that is, even if it does not start up normally, you can flash it using original Samsung downloader software to restore it to the working state.

To enter download mode:

  •  Disconnect PC cable;
  •  Insert battery;
  •  Hold both ‘Volume Down’ and ‘Home’ keys and press Power-On.

_

RIFF JTAG – Samsung Galaxy Note (GT-N7000) Unbrick – Dead Boot Repair supported

28.12.2011    Samsung Galaxy Note (GT-N7000) Unbrick – Dead Boot Repair supported

Samsung N7000 AP (PDA Part) is based on the S5PV310 (Exynos 4210) Processor (Cortex-A9 Dual-Core). JTAG pads are very small; professional experience in soldering is required to connect wires to the JTAG interface.
Note, one simple way to connect over JTAG – connect USB cable to PC and insert battery. In this case phone is automatically powered on.

To resurrect Samsung N7000 AP:

  •  Solder JTAG cable to Samsung N7000 AP JTAG pads;
  •  Connect USB cable to phone and PC;
  •  Insert battery;
  •  Make sure Samsung N7000 AP is selected in the list of models;
  •  Make sure a fixed TCK frequency is selected;
  •  Click Resurrect button;
  •  Wait till software signals a successful operation completion;
  •  Disconnect USB cable, de-solder JTAG wires;

Now phone is in bootable condition, that is, even if it does not start up normally, you can flash it using original Samsung downloader software to restore it to the working state.

To enter download mode:

  •  Disconnect PC cable;
  •  Insert battery;
  •  Hold both ‘Volume Down’ and ‘Home’ keys and press Power-On.

_

RIFF JTAG – Samsung Wave II S8530 Unbrick, Boot repair supported

30.09.2011  Samsung Wave II S8530 Unbrick, Boot repair supported

Samsung S8530 PDA is based on the S5PCxxx Processor (ARM core is Cortex-A8).
You will have to carefully scratch off the mask covering in order to access copper surface of the JTAG pads.
Note, one simple way to connect over JTAG – connect USB cable to PC and insert battery. In this case phone is automatically powered on, so no need to press any power-on buttons on the phone keypad.

To resurrect Samsung S8530:

  •  Solder JTAG cable to Samsung S8530 JTAG pads;
  •  Connect USB cable to phone and PC;
  •  Insert battery;
  •  Make sure Samsung S8530 is selected in the list of models;
  •  Make sure a fixed TCK frequency is selected;
  •  Click Resurrect button;
  •  Wait till software signals a successful operation completion;
  •  Disconnect USB cable, de-solder JTAG wires;

Now phone is in bootable condition, that is, even if it does not start up normally, you can flash it using original Samsung downloader software to restore it to the working state. We used MultiLoader 5.64 version.

To enter download mode:

  •  Disconnect PC cable;
  •  Insert battery;
  •  Hold both ‘Volume Down’ (from the left side of phone) and ‘Hold’ (right side at top) keys and press Power-On.

RIFF JTAG – Toshiba Portege G900 Unbrick, Dead Boot repair supported

14.03.2011 Toshiba Portege G900 Unbrick, Dead Boot repair supported

Resurrection of Toshiba Portégé G900 PDA part is not hard. Battery is required for successful HALT operation. If USB Data Cable is connected phone is auto powered on when battery is inserted.
If during connect operation (“Establish communication with the phone…”) after 2-3 passes there is still no success (progress bar keeps running from 0 to 100% and so on) then remove battery and insert it again. If USB cable is not connected then press and hold Power On key.
Current resurrector re-flashes only the EBOOT and secondary EBOOT area, and will not re-write IPL area (though write of this area is supported too).
Please note: DiskOnChip G4 memory has security features, due to which there is a risk of permanently blocking the access to the flash memory while re-flashing the IPL areas. Current resurrector will not touch the IPL zone, but it is possible you’re already holding such killed device in hands. If it is so you will see this error:
****************************************************************
Detected a Not Initialized FLASH1 Chip ID: 0x0400/0xFBFF
ERROR: Selected FLASH Chip was not initialized by the DCC Loader
****************************************************************

This can happen due to unknown protection keys used or due to permanently blocked MDOC chip. If latter is true we advise you to solder a new flash memory chip or throw this phone away to the trash bin.

To resurrect Toshiba G900 PDA part:

  • Solder JTAG wires to the Toshiba G900 PDA pads;
  • Connect USB cable to phone and PC;
  • Make sure Toshiba G900 PDA is selected in the list of models;
  • Insert battery and click Resurrect button;
  • Wait till software signals a successful operation completion;
  • Disconnect USB cable, de-solder JTAG wires;

Now phone is in bootable condition, that is, even if it does not start up normally, you can flash it using known flashing methods.

To enter USB download mode:

  • Disconnect PC cable;
  • Insert battery;
  • Hold ‘Left soft’ key (which is exactly above the Dial key) and press ‘Power ON’ button. In few seconds you should see red download screen.

To enter SD-card download mode:

  • Disconnect PC cable;
  • Insert battery;
  • Hold ‘D’ key and press ‘Power ON’ button.

Additional info:

  • Phone has DiskOnChip G4 memory type, which has security features. It has two password protected partitions (Password1 = 12345678, Password2 = 00000000);
  • IPL re-flash is not performed in this resurrector on purpose. While re-flashing the IPL area there is a risk of permanently blocking the memory chip.
  • Any write access (Erase or Write) on MDOC NAND memory range 0x00000000 to 0x0017FFFF is rejected by the DCC Loader. For full image writing convenience access to that range will not rise any error, data will just be ignored and reported as if it was written successfully, thus you still can write full image files using ‘Auto FullFlash Size’ checked.

Please click “Check For Updates” button in order to download and apply new files. Closing all running application before starting update process is recommended.

RIFF Box Support


RIFF Box Viber community
Scan QR code to join, or click above link.

Getting  started with RIFF JTAG
Riff Box short notes for novices
Continue reading