RIFF JTAG – Samsung GT-P3113 Galaxy Tab 2 7.0 Unbrick – Dead boot repair supported

21.02.2013  RIFF JTAG – Samsung GT-P3113 Galaxy Tab 2 7.0 Unbrick – Dead boot repair supported

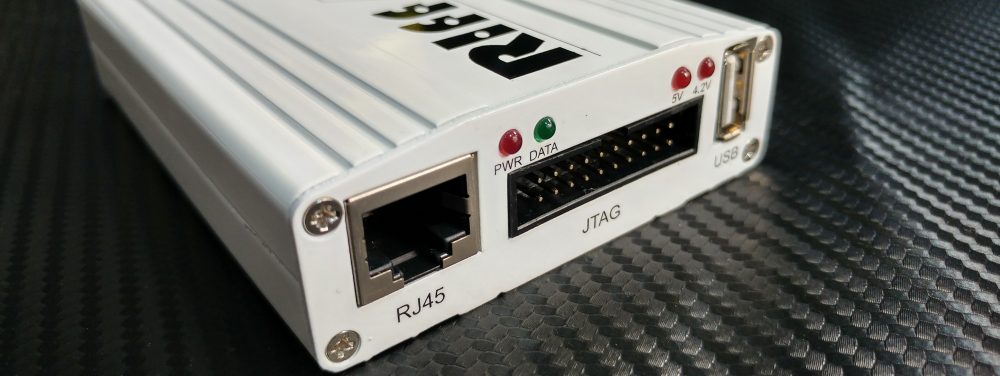
Samsung P3113 is based on the OMAP4430 Processor (Cortex-A9 Dual-Core). JTAG pads are very small; professional experience in soldering is required to connect wires to the JTAG interface.
Please note: The initial loader in the Samsung P3113 is XLOADER. Due to OMAP4430’s some peculiar TrustZone security features current resurrector will boot only in case XLOADER is alive. That’s why model name of current resurrector has additional text: ‘XLoader+’. In case XLOADER is damaged (which happens for example after wrong firmware reflash), you will have to use different resurrector DLL – the one with the ‘XLoader-” delimiter.

To resurrect Samsung P3113:

  •  Solder JTAG cable to Samsung P3113 JTAG pads;
  •  Connect USB cable to phone and PC;
  •  Insert battery;
  •  Make sure Samsung P3113 is selected in the list of models;
  •  Make sure a fixed TCK frequency is selected;
  •  Click Resurrect button;
  •  Wait till software signals a successful operation completion;
  •  Disconnect USB cable, de-solder JTAG wires;

Now phone is in bootable condition, that is, even if it does not start up normally, you can flash it using original Samsung downloader software to restore it to the working state.

To enter download mode:

  •  Disconnect PC cable;
  •  Insert battery;
  •  Hold ‘Volume Down’ key and press Power-On.

samsung_galaxy_tab_2_70_2

RIFF JTAG – Samsung GT-P3110 Galaxy Tab 2 7.0 Unbrick – Dead boot repair supported

21.02.2013   RIFF JTAG – Samsung GT-P3110 Galaxy Tab 2 7.0 Unbrick – Dead boot repair supported

Samsung P3110 is based on the OMAP4430 Processor (Cortex-A9 Dual-Core). JTAG pads are very small; professional experience in soldering is required to connect wires to the JTAG interface.
Please note: The initial loader in the Samsung P3110 is XLOADER. Due to OMAP4430’s some peculiar TrustZone security features current resurrector will boot only in case XLOADER is alive. That’s why model name of current resurrector has additional text: ‘XLoader+’. In case XLOADER is damaged (which happens for example after wrong firmware reflash), you will have to use different resurrector DLL – the one with the ‘XLoader-” delimiter.

To resurrect Samsung P3110:

  •  Solder JTAG cable to Samsung P3110 JTAG pads;
  •  Connect USB cable to phone and PC;
  •  Insert battery;
  •  Make sure Samsung P3110 is selected in the list of models;
  •  Make sure a fixed TCK frequency is selected;
  •  Click Resurrect button;
  •  Wait till software signals a successful operation completion;
  •  Disconnect USB cable, de-solder JTAG wires;

Now phone is in bootable condition, that is, even if it does not start up normally, you can flash it using original Samsung downloader software to restore it to the working state.

To enter download mode:

  •  Disconnect PC cable;
  •  Insert battery;
  •  Hold ‘Volume Down’ key and press Power-On.

.
samsung_galaxy_tab_2_70_2

RIFF JTAG – Samsung GT-P3100 Galaxy Tab 2 7.0 Unbrick – Dead boot repair supported

21.02.2013  RIFF JTAG – Samsung GT-P3100 Galaxy Tab 2 7.0 Unbrick – Dead boot repair supported

Samsung P3100 is based on the OMAP4430 Processor (Cortex-A9 Dual-Core). JTAG pads are very small; professional experience in soldering is required to connect wires to the JTAG interface.
Please note: The initial loader in the Samsung P3100 is XLOADER. Due to OMAP4430’s some peculiar TrustZone security features current resurrector will boot only in case XLOADER is alive. That’s why model name of current resurrector has additional text: ‘XLoader+’. In case XLOADER is damaged (which happens for example after wrong firmware reflash), you will have to use different resurrector DLL – the one with the ‘XLoader-” delimiter.

To resurrect Samsung P3100:

  •  Solder JTAG cable to Samsung P3100 JTAG pads;
  •  Connect USB cable to phone and PC;
  •  Insert battery;
  •  Make sure Samsung P3100 is selected in the list of models;
  •  Make sure a fixed TCK frequency is selected;
  •  Click Resurrect button;
  •  Wait till software signals a successful operation completion;
  •  Disconnect USB cable, de-solder JTAG wires;

Now phone is in bootable condition, that is, even if it does not start up normally, you can flash it using original Samsung downloader software to restore it to the working state.

To enter download mode:

  •  Disconnect PC cable;
  •  Insert battery;
  •  Hold ‘Volume Down’ key and press Power-On.

.
samsung_galaxy_tab_2_70

RIFF JTAG – Samsung GT-P5110 Galaxy Tab 2 10.1 WiFi Unbrick – Dead Boot repair supported

25.01.2013 RIFF JTAG – Samsung GT-P5110 Galaxy Tab 2 10.1 WiFi Unbrick – Dead Boot repair supported

Samsung P5110 is based on the OMAP4430 Processor (Cortex-A9 Dual-Core). JTAG pads are very small; professional experience in soldering is required to connect wires to the JTAG interface.
Please note: The initial loader in the Samsung P5110 is XLOADER. Due to OMAP4430’s some peculiar TrustZone security features current resurrector will boot only in case XLOADER is alive. That’s why model name of current resurrector has additional text: ‘XLoader+’. In case XLOADER is damaged (which happens for example after wrong firmware reflash), you will have to use different resurrector DLL – the one with the ‘XLoader-” delimiter.

To resurrect Samsung P5110:

  •  Solder JTAG cable to Samsung P5110 JTAG pads;
  •  Connect USB cable to phone and PC;
  •  Insert battery;
  •  Make sure Samsung P5110 is selected in the list of models;
  •  Make sure a fixed TCK frequency is selected;
  •  Click Resurrect button;
  •  Wait till software signals a successful operation completion;
  •  Disconnect USB cable, de-solder JTAG wires;

Now phone is in bootable condition, that is, even if it does not start up normally, you can flash it using original Samsung downloader software to restore it to the working state.

To enter download mode:

  •  Disconnect PC cable;
  •  Insert battery;
  •  Hold ‘Volume Down’ key and press Power-On.

.
samsung_galaxy_tab2_101

RIFF JTAG – Haier C2010 Ubrick – Dead Boot repair supported

29.12.2012   RIFF JTAG – Haier C2010 Ubrick – Dead Boot repair supported

Resurrecting Haier C2010 is simple. Phone is auto powered on with USB Cable connected to the PC. Battery presence is not required; connection can be established with detached board.
Current resurrector contains Firmware and EEPROM zones for memory chip with ID 0x0020/0x8832

To resurrect Haier C2010:

  •  Solder JTAG cable to Haier C2010 JTAG pads;
  •  Insert USB Data cable into board and PC;
  •  Make sure Haier C2010 is selected in the list of models;
  •  Click Resurrect button;
  •  Choose which areas to flash;
  •  Wait till software signals a successful operation completion;
  •  De-solder JTAG wires;

.
haier-c2010-mobile-phone-medium-1

RIFF JTAG – STB Orton 4100C Unbrick supported

06.04.2012    RIFF JTAG – STB Orton 4100C Unbrick supported

Repairing bricked Orton 4100C is easy with the RIFF Box. Receiver is based on the ALI M3329C processor. Receiver is powered on when power plug is attached. If connection process stops at “Establish communication with the phone…” just reset the receiver’s power.
Current resurrector contains Boot, Firmware and Data zones which in total is complete full connects for 2Mb SPI serial memory chip.
Please note, to enable JTAG you have to make sure the JP1 jumper on board is not shorted. Sometimes you may need to disconnect front LED panel interface cable from the board (13-pin connector). After resurrection do not forget to solder the resistor back or shortcut JP1 jumper.
To resurrect Orton 4100C:

  •  Solder JTAG cable to Orton 4100C JTAG pads;
  •  Make sure Orton 4100C is selected in the list of models;
  •  Connect power;
  •  Click Resurrect button;
  •  Choose which areas to flash;
  •  Wait till software signals a successful operation completion;
  •  De-solder JTAG wires;

Now receiver is in bootable condition, that is, even if it does not start up normally you can flash it via UART using known flashing methods. Or you can do resurrection checking full clone resurrect option – this will re-write all flash memory contents.
.

RIFF JTAG – STB EuroSky ES-4100 Unbrick supported

06.04.2012   RIFF JTAG – STB EuroSky ES-4100 Unbrick supported

Repairing bricked EuroSky ES-4100 is easy with the RIFF Box. Receiver is based on the ALI M3329C processor. Receiver is powered on when power plug is attached. If connection process stops at “Establish communication with the phone…” just reset the receiver’s power.
Current resurrector contains Boot, Firmware and Data zones which in total is complete full connects for 2Mb SPI serial memory chip.
Please note, to enable JTAG you have to make sure the JP1 jumper on board is not shorted, desolder resistor R65. Sometimes you may need to disconnect front LED panel interface cable from the board (13-pin connector). After resurrection do not forget either to solder the resistor back or shortcut JP1 jumper.

To resurrect EuroSky ES-4100:

  •  Solder JTAG cable to EuroSky ES-4100 JTAG pads;
  •  Make sure EuroSky ES-4100 is selected in the list of models;
  •  Connect power;
  •  Click Resurrect button;
  •  Choose which areas to flash;
  •  Wait till software signals a successful operation completion;
  •  De-solder JTAG wires;

Now STB is in bootable condition, that is, even if it does not start up normally you can flash it via UART using known flashing methods. Or you can do resurrection checking full clone resurrect option – this will re-write all flash memory contents.
.

RIFF JTAG – CDMA Olive C2110 Supported

27.12.2011    CDMA Olive C2110 Supported

Resurrecting Olive C2110 is simple. Phone is auto powered on with USB Cable connected to the PC. Battery presence is not required; connection can be established with detached board.
Current resurrector contains Firmware and EEPROM zones for memory chip with ID 0x00EC/0x2254

To resurrect Olive C2110:

  •  Solder JTAG cable to Olive C2110 JTAG pads;
  •  Insert USB Data cable into board and PC;
  •  Make sure Olive C2110 is selected in the list of models;
  •  Click Resurrect button;
  •  Choose which areas to flash;
  •  Wait till software signals a successful operation completion;
  •  De-solder JTAG wires;

_

RIFF JTAG – CDMA Samsung B339 Breeze Supported

23.12.2011 CDMA Samsung B339 Breeze Supported

Resurrecting Samsung B339 is simple. Phone is auto powered on with USB Cable connected to the PC. Battery presence is not required; connection can be established with detached board.
Current resurrector contains Firmware and EEPROM zones for memory chip with ID 0x00EC/0x2256

To resurrect Samsung B339:

  •  Solder JTAG cable to Samsung B339 JTAG pads;
  •  Insert USB Data cable into board and PC;
  •  Make sure Samsung B339 is selected in the list of models;
  •  Click Resurrect button;
  •  Choose which areas to flash;
  •  Wait till software signals a successful operation completion;
  •  De-solder JTAG wires;

_

RIFF JTAG – CDMA Huawei C3500 Supported

23.12.2011    CDMA Huawei C3500 Supported 

Resurrecting Huawei C3500 is simple. Phone is auto powered on with USB Cable connected to the PC. Battery presence is not required; connection can be established with detached board.
Current resurrector contains Firmware and EEPROM zones for memory chip with ID 0x00EC/0x257E

To resurrect Huawei C3500:

  •  Solder JTAG cable to Huawei C3500 JTAG pads;
  •  Insert USB Data cable into board and PC;
  •  Make sure Huawei C3500 is selected in the list of models;
  •  Click Resurrect button;
  •  Choose which areas to flash;
  •  Wait till software signals a successful operation completion;
  •  De-solder JTAG wires;

_