RIFF JTAG – Samsung SGH-T679 Exhibit II 4G (Samsung Ancora) Unbrick – Dead Boot repair supported

04.05.2012 RIFF JTAG – Samsung SGH-T679 Exhibit II 4G (Samsung Ancora) Unbrick – Dead Boot repair supported

Repairing bricked Samsung T679 is easy with the RIFF Box. Phone is auto powered on with USB Data Cable connected to the PC while battery is connected.
Please note, MSM8255T is multi-core chipset – it has ARM11 and Qualcomm Scorpion cores. During power on sequence only ARM11 core is visible on the JTAG chain. If boots are not completely damaged and it comes up to initializing of the Scorpion core then Scorpion core appears on the JTAG chain too. This will shift ARM11 from TAP0 into TAP1 position on the chain, while current resurrector has the ARM11 core hardcoded at TAP0 position. Thus make sure to establish JTAG connection in the time range while Scorpion core is not visible yet.

To resurrect Samsung T679:

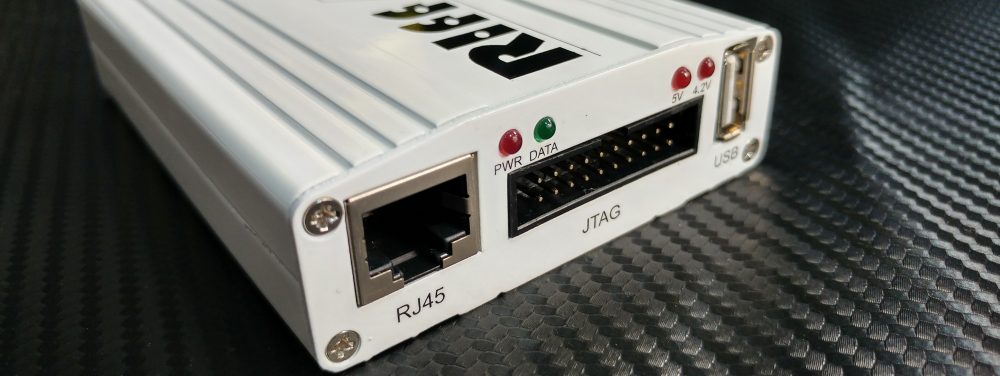
  •  Solder JTAG cable to Samsung T679 JTAG pads;
  •  Make sure Samsung T679 is selected in the list of models;
  •  Insert battery and connect USB Data cable;
  •  If you use only battery, press Power On key;
  •  Click Resurrect button;
  •  Wait till software signals a successful operation completion;
  •  Disconnect power supply, de-solder JTAG wires;

Now phone is in bootable condition, that is, even if it does not start up normally you can flash it using known flashing methods.

To enter download mode:

  •  Disconnect PC cable;
  •  Insert battery;
  •  Hold ‘Volume Down’ key and press ‘Power ON’ button.

.

RIFF JTAG – Samsung SCH-i920 Omnia II 8GB Unbrick – Dead Boot repair supported

RIFF JTAG – Samsung SCH-i920 Omnia II 8GB Unbrick – Dead Boot repair supported

Repairing bricked Samsung I920 AP (PDA Part) is easy with RIFF Box. Due to some hardware pecularities, we recommend to use only battery without USB cable connected. Please note, during connection establishment phase you will have to press the Power On key twice.

To resurrect Samsung I920 AP:

  •  Solder JTAG cable to Samsung I920 AP JTAG pads;
  •  Make sure Samsung I920 AP is selected in the list of models;
  •  Insert battery; make sure no USB cable or charger is connected;
  •  Press the Power On key;
  •  Click Resurrect button;
  •  When it stops at “Establish communication with the phone…” press the Power On key again;
  •  Wait till software signals a successful operation completion;
  •  Disconnect USB cable, de-solder JTAG wires;

To resurrect Samsung I920 CP:

  •  Solder JTAG cable to Samsung I920 CP JTAG pads;
  •  Make sure Samsung I920 CP is selected in the list of models;
  •  Insert battery and connect USB cable or charger;
  •  Wait till AP part boots up completely;
  •  Click Resurrect button;
  •  Wait till software signals a successful operation completion;
  •  Disconnect USB cable, de-solder JTAG wires;

Now phone is in bootable condition, that is, even if it does not start up normally, you can flash it using known flashing methods.
.

RIFF JTAG – Samsung Wave 3 GT-S8600 Unbrick – Boot repair supported, World First ! ! !

29.02.2012    Samsung Wave 3 GT-S8600 Unbrick – Boot repair supported, World First !  !  !

Resurrecting Samsung S8600 is easy. Phone is auto powered on with USB Data Cable connected to the PC while battery is connected.
Please note, MSM8255T is dual core chipset – it has ARM11 and Qualcomm Scorpion cores. During power on sequence only ARM11 core is visible on the JTAG chain. If boots are not completely damaged and it comes up to initializing of the Scorpion core then Scorpion core appears on the JTAG chain too. This will shift ARM11 from TAP0 into TAP1 position on the chain, while current resurrector has the ARM11 core hardcoded at TAP0 position. Thus make sure to establish JTAG connection in the time range while Scorpion core is not visible yet.

To resurrect Samsung S8600:

  •  Solder JTAG cable to Samsung S8600 JTAG pads;
  •  Make sure Samsung S8600 is selected in the list of models;
  •  Insert battery and connect USB Data cable;
  •  If you use only battery, press Power On key;
  •  Click Resurrect button;
  •  Wait till software signals a successful operation completion;
  •  Disconnect power supply, de-solder JTAG wires;

Now phone is in bootable condition, that is, even if it does not start up normally you can flash it using known flashing methods.

To enter download mode:

  •  Disconnect PC cable;
  •  Insert battery;
  •  Hold both ‘Volume Down’ and ‘Menu’ keys and press ‘Power ON’ button.

.

RIFF JTAG – Samsung GT-i8150 Galaxy W (Samsung Ancora) Unbrick – Boot repair supported

10.01.2012   Samsung GT-i8150 Galaxy W (Samsung Ancora) Unbrick – Boot repair supported

Resurrecting Samsung I8150 is easy. Phone is auto powered on with USB Data Cable connected to the PC while battery is connected.
Please note, MSM8255T is dual core chipset – it has ARM11 and Qualcomm Scorpion cores. During power on sequence only ARM11 core is visible on the JTAG chain. If boots are not completely damaged and it comes up to initializing of the Scorpion core then Scorpion core appears on the JTAG chain too. This will shift ARM11 from TAP0 into TAP1 position on the chain, while current resurrector has the ARM11 core hardcoded at TAP0 position. Thus make sure to establish JTAG connection in the time range while Scorpion core is not visible yet.
To resurrect Samsung I8150:

  •  Solder JTAG cable to Samsung I8150 JTAG pads;
  •  Make sure Samsung I8150 is selected in the list of models;
  •  Insert battery and connect USB Data cable;
  •  If you use only battery, press Power On key;
  •  Click Resurrect button;
  •  Wait till software signals a successful operation completion;
  •  Disconnect power supply, de-solder JTAG wires;

Now phone is in bootable condition, that is, even if it does not start up normally you can flash it using known flashing methods.

To enter download mode:

  •  Disconnect PC cable;
  •  Insert battery;
  •  Hold ‘Volume Down’ key and press ‘Power ON’ button.

_

RIFF JTAG – Samsung i9003 Galaxy SL Unbrick, Boot repair supported

28.10.2011  Samsung i9003 Galaxy SL Unbrick, Boot repair supported

Samsung I9003 is based on the OMAP3630 (ARM core is Cortex-A8).
Note, one simple way to connect over JTAG – connect USB cable to PC and insert battery. In this case phone is automatically powered on. But note, in very rare cases it is possible that you will have to hold Power On key during initial connection.
In case after resurrection (after you have tried with both boot versions) the download mode is not initiated (LCD remains blank) do repeat resurrection with ‘Clone Gremlin zone’ option checked.
Please note, in most cases you will be required to insert Samsung I9003 RIFF™ MagicCard into phone’s SD slot before starting resurrection. In case you don’t have such card yet, you can create it on the “Samsung I9003 RIFF™ MagicCard” page of the resurrector settings dialog.
Due to OMAP3630’s some peculiar TrustZone security features current resurrector may fail to boot: if this happens, use Samsung I9003 IRAM resurrector – which works much slower but boots without problems.

To resurrect Samsung I9003:

  •  Solder JTAG cable to Samsung I9003 JTAG pads;
  •  Insert Samsung I9003 RIFF™ MagicCard into phone’s SD slot;
  •  Connect USB cable to phone and PC;
  •  Insert battery;
  •  Make sure Samsung I9003 is selected in the list of models;
  •  Click Resurrect button;
  •  Wait till software signals a successful operation completion;
  •  Disconnect USB cable, de-solder JTAG wires;

Now phone is in bootable condition, that is, even if it does not start up normally, you can flash it using original Samsung downloader software to restore it to the working state.

To enter download mode:

  •  Disconnect PC cable;
  •  Insert battery;
  •  Hold both ‘Volume Down’ and ‘Home’ keys and press Power-On.

RIFF JTAG – Samsung Galaxy S Plus Unbrick, boot repair supported

26.10.2011  Samsung Galaxy S Plus (i9001) Unbrick, boot repair supported

Resurrecting Samsung I9001 is easy. Phone is auto powered on with USB Data Cable connected to the PC while battery is connected.
Please note, MSM8255T is dual core chipset – it has ARM11 and Qualcomm Scorpion cores. During power on sequence only ARM11 core is visible on the JTAG chain. If boots are not completely damaged and it comes up to initializing of the Scorpion core then Scorpion core appears on the JTAG chain too. This will shift ARM11 from TAP0 into TAP1 position on the chain, while current resurrector has the ARM11 core hardcoded at TAP0 position. Thus make sure to establish JTAG connection in the time range while Scorpion core is not visible yet.

To resurrect Samsung I9001:

  •  Solder JTAG cable to Samsung I9001 JTAG pads;
  •  Make sure Samsung I9001 is selected in the list of models;
  •  Insert battery and connect USB Data cable;
  •  If you use only battery, press Power On key;
  •  Click Resurrect button;
  •  Wait till software signals a successful operation completion;
  •  Disconnect power supply, de-solder JTAG wires;

Now phone is in bootable condition, that is, even if it does not start up normally you can flash it using known flashing methods.

To enter download mode:

  •  Disconnect PC cable;
  •  Insert battery;
  •  Hold ‘Volume Down’ key and press ‘Power ON’ button.