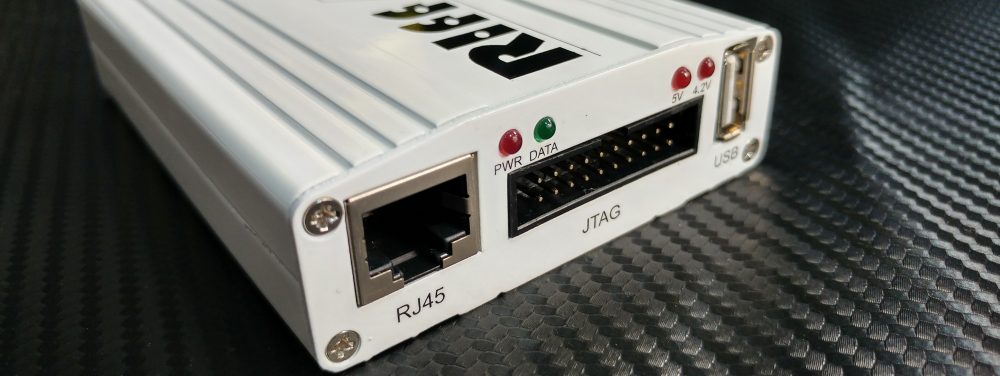
RIFF JTAG – Lynksis Router LinkSys WRT54G unbrick supported

06.04.2012 RIFF JTAG – Lynksis Router LinkSys WRT54G unbrick supported
Repairing bricked LinkSys WRT54GL is easy with the RIFF Box. Router is powered on when power plug is attached. If connection process stops at “Establish communication with the phone…” just reset router’s power.
Current resurrector contains Boot, Configuration and Firmware zones for memory chip with ID 0x00C2/0x22A8

To resurrect LinkSys WRT54GL:

  •  Solder JTAG cable to LinkSys WRT54GL JTAG pads;
  •  Insert USB Data cable into board and PC;
  •  Make sure LinkSys WRT54GL is selected in the list of models;
  •  Click Resurrect button;
  •  Choose which areas to flash;
  •  Wait till software signals a successful operation completion;
  •  De-solder JTAG wires;

Now router is in bootable condition, that is, even if it does not start up normally you can flash it via UART using known flashing methods. Or you can do resurrection checking full clone resurrect option – this will re-write all flash memory contents.
.

RIFF JTAG – eMMC Partition Plugin v1.0 (Qualcomm EBR-MBR based eMMC flash images processing)

RIFF JTAG – eMMC Partition Plugin v1.0 (Qualcomm EBR-MBR based eMMC flash images processing)

This plugin works with eMMC image files which have standard Master Boot Record (MBR) and Extended Boot Record (EBR) formatting. Most of eMMC-bootable mobile phones have their eMMC memory formatted in such style. In this case partitions are accessed in standard way, by Partition ID: for example boot loader partitions or OS image partition (compare with qualcomm MIBIB partitioning: while ‘MIBIB’-type partitions have standalone partition descriptor block which contains info on all partitions and is posistioned in a definite NAND address, the eMMC partitioning is one MBR sector at fixed position + a chain of EBR sectors which are scattered throughout the eMMC address space in a literally random way).
This plugin is a powerfull tool which enormously simplifies resurrection process (providing you have the required boot files from an official firmware or you have a ‘donor’ device) for those devices which are not yet supported by a dedicated resurrector DLL.
Please note, such phones as Samsung Exynos MCU based pohones (for example I9100, P6200, P6800, N7000, I9220 and etc), though have eMMC chip, are not partitioned in MBR way and thus are not the subject for the current plugin. These phones are to be processed by different plugin.

With the help of this plugin you can do:

  •  Disassemble a full (or, since eMMC full image files are too large, a partial) eMMC Image File previously obtained with JTAG Manager (DCC Read/Write Page);
  •  Inspect each partition contents;
  •  Save separate partitions to HDD;
  •  Save all partitions as standalone files to HDD;
  •  Build-up your own full image file: for this you need to read from device (by clicking “Load Image from Device” button) or open from file (by clicking “Load Image from File” button) the eMMC partitioning data and then by selecting desired partitions click “Inject Into Partition” button to upload data from file into selected partition. Then you can save all full image file to HDD or flash injected partitions directly into device;
  •  Write a chosen partition directly into device;
  •  Read a chosen partition directly from device and substitute old partition contents to new ones;
  •  Create eMMC partitioning snapshot (that is storing info on full EBR chain: each EBR sector position).
  •  Restore eMMC partitioning from previously taken file: it is convenient if eMMC memory is erased and all formatting data is lost.
  •  Plugin supports new RIFF™ shrinked binary files format (*.riffpbin): which allows to shrink huge eMMC Image files into small sized-files (for example, Image File for 14GB empty eMMC chip is shrinked into ~10 KByte(!) size), thus HDD space is preserved, while performance is not visibly effected.

Please note, direct read/write operations from/to the device will require proper resurrector to be set (Resurrector Settings: thus before clicking the Activate Plugin button make sure proper model is selected as well as other settings like TCK/RTCK frequencies).
.

RIFF JTAG – JTAG Manager v1.41, RIFF Box firmware v1.31 released

14.03.2012   RIFF JTAG – JTAG Manager v1.41, RIFF Box firmware v1.31 released

Whats new:


  • RIFF Box firmware v1.31

    APQ8060, MSM8260, MSM8660 (3rd generation Qualcomm chipsets) support is added.
    – Fixed ARM7 bug: exit from debug state into THUMB mode was corrupted.
    – Added after-halt “Emergency” script execution for ARM7 cores. 
  • RIFF JTAG Manager v1.41

    APQ8060, MSM8260, MSM8660 (3rd generation Qualcomm chipsets) support is added.
    – Fixed SettingsCode bug which was spawned after we’ve transfered to 12-digit wide 64-bit hex numbers representation.
  •  RIFF Direct JTAG Access plugin v1.03

    – Added chipsets APQ8060, MSM8260, MSM8660
    – Added APQ8060 eMMC controllers #1..5 support
    – Added MSM8260 eMMC controllers #1..5 support
    – Added MSM8660 eMMC controllers #1..5 support


RIFF JTAG – LG P350 Pecan / Optimus Me Unbrick – Boot Repair supported

12.03.2012   RIFF JTAG – LG P350 Pecan / Optimus Me Unbrick – Boot Repair supported

Resurrecting LG P350 is very hard because it requires non-beginner soldering skills (since JTAG pads on board are very small and are close to each other).
Phone is auto powered on with USB Data Cable connected to the PC. Battery presence is not required; connection can be established with detached board.

To resurrect LG P350:

  •  Solder JTAG cable to LG P350 JTAG pads;
  •  Insert USB Data cable into board and PC;
  •  Make sure LG P350 is selected in the list of models;
  •  Click Resurrect button;
  •  Wait till software signals a successful operation completion;
  •  Disconnect power supply, de-solder JTAG wires;

Now phone is in bootable condition, that is, even if it does not start up normally, you can flash it using known flashing methods. We used KDZ_FW_UPD update software (with settings Type = 3GQCP, PhoneMode = EMERGENCY) to flash the *.KDZ firmware into phone.

To enter emergency mode:

  •  Disconnect PC cable;
  •  Insert battery;
  •  Hold ‘Volume down’ key and press ‘Power ON’ button. In few seconds you should see emergency mode screen saying “DOWNLOAD MODE”.

.

RIFF JTAG – CDMA Olive C2110 Supported

27.12.2011    CDMA Olive C2110 Supported

Resurrecting Olive C2110 is simple. Phone is auto powered on with USB Cable connected to the PC. Battery presence is not required; connection can be established with detached board.
Current resurrector contains Firmware and EEPROM zones for memory chip with ID 0x00EC/0x2254

To resurrect Olive C2110:

  •  Solder JTAG cable to Olive C2110 JTAG pads;
  •  Insert USB Data cable into board and PC;
  •  Make sure Olive C2110 is selected in the list of models;
  •  Click Resurrect button;
  •  Choose which areas to flash;
  •  Wait till software signals a successful operation completion;
  •  De-solder JTAG wires;

_

RIFF JTAG – CDMA Samsung B339 Breeze Supported

23.12.2011 CDMA Samsung B339 Breeze Supported

Resurrecting Samsung B339 is simple. Phone is auto powered on with USB Cable connected to the PC. Battery presence is not required; connection can be established with detached board.
Current resurrector contains Firmware and EEPROM zones for memory chip with ID 0x00EC/0x2256

To resurrect Samsung B339:

  •  Solder JTAG cable to Samsung B339 JTAG pads;
  •  Insert USB Data cable into board and PC;
  •  Make sure Samsung B339 is selected in the list of models;
  •  Click Resurrect button;
  •  Choose which areas to flash;
  •  Wait till software signals a successful operation completion;
  •  De-solder JTAG wires;

_

RIFF JTAG – CDMA Huawei C3500 Supported

23.12.2011    CDMA Huawei C3500 Supported 

Resurrecting Huawei C3500 is simple. Phone is auto powered on with USB Cable connected to the PC. Battery presence is not required; connection can be established with detached board.
Current resurrector contains Firmware and EEPROM zones for memory chip with ID 0x00EC/0x257E

To resurrect Huawei C3500:

  •  Solder JTAG cable to Huawei C3500 JTAG pads;
  •  Insert USB Data cable into board and PC;
  •  Make sure Huawei C3500 is selected in the list of models;
  •  Click Resurrect button;
  •  Choose which areas to flash;
  •  Wait till software signals a successful operation completion;
  •  De-solder JTAG wires;

_

RIFF JTAG – CDMA Huawei C2856 Supported

22.11.2011  CDMA Huawei C2856 Supported

Resurrecting Huawei C2856 is simple. Phone is auto powered on with USB Cable connected to the PC. Battery presence is not required; connection can be established with detached board.
Current resurrector contains Firmware and EEPROM zones for memory chip with ID 0x0020/0x88C0

To resurrect Huawei C2856:

  •  Solder JTAG cable to Huawei C2856 JTAG pads;
  •  Insert USB Data cable into board and PC;
  •  Make sure Huawei C2856 is selected in the list of models;
  •  Click Resurrect button;
  •  Choose which areas to flash;
  •  Wait till software signals a successful operation completion;
  •  De-solder JTAG wires;

_

RIFF JTAG – CDMA Haier C301R supported

20.12.2011   CDMA Haier C301R supported

Resurrecting Haier C301R is simple. Phone is auto powered on with USB Cable connected to the PC. Battery presence is not required; connection can be established with detached board.
Current resurrector contains Firmware and EEPROM zones for memory chip with ID 0x00EC/0x257E

To resurrect Haier C301R:

  •  Solder JTAG cable to Haier C301R JTAG pads;
  •  Insert USB Data cable into board and PC;
  •  Make sure Haier C301R is selected in the list of models;
  •  Click Resurrect button;
  •  Choose which areas to flash;
  •  Wait till software signals a successful operation completion;
  •  De-solder JTAG wires;